
Glowforge machines, as well as all other laser-cutting machines, give off potentially dangerous fumes that need to be vented. Seriously, you don’t want to take the chance of breathing in toxic fumes and passing out from working in a poorly ventilated space. Your creations are not worth your life. Now that I’ve sufficiently scared you into being a vent-or-die advocate, let’s talk about your options for how to safely vent your Glowforge laser.
Step 1. Connect your Glowforge Vent Hose
All Glowforge models include a 4-inch wide by 8-foot long exhaust vent hose in their Accessory Kit mailed to you along with your machine. The exhaust connection on the back of the machine is a standard 4″ exhaust vent, similar to what one would use with a clothes dryer.
Glowforge Aura Vent Hose

Glowforge Plus & Pro Vent Hose

Glowforge Venting Upgrades for Plus & Pro models
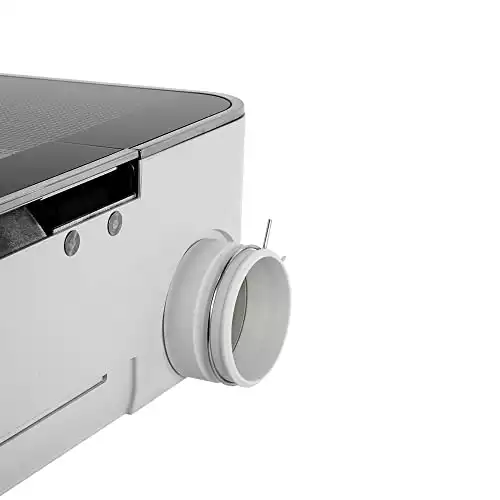
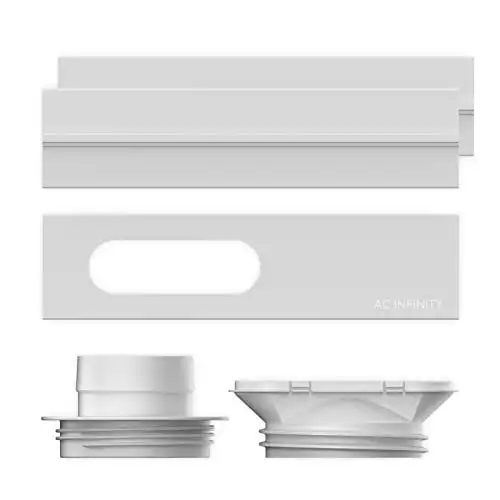
The exhaust vent hose included with your purchase is rather thin and flimsy and will tear the more you connect and disconnect it. Also, the machine’s exhaust port is rather shallow, and admittedly you will be fighting it to get the hose and ring clamp to stay attached. Save your knuckles and yourself from frustration, and purchase an exhaust port extender!
Absolute must-have, knuckle-saver attachment that corrects the short one on the machine.
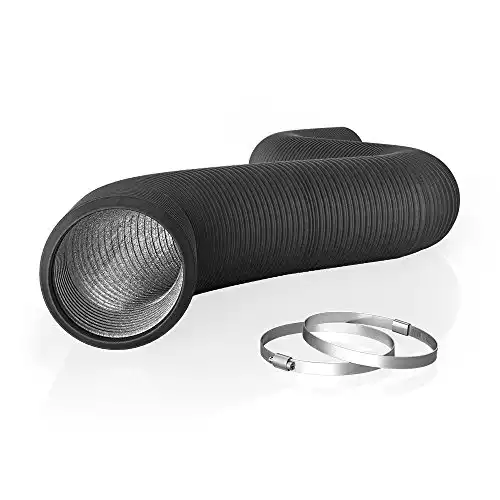
Thicker & more durable than the silver hose included with Glowforge Plus & Pro.
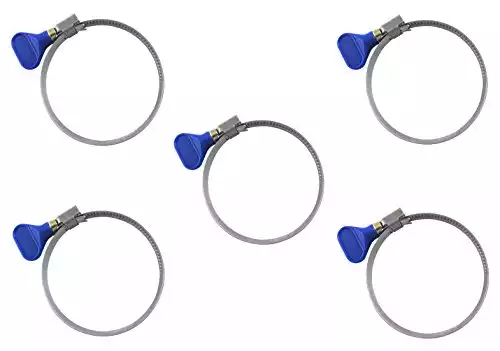
Easier to use than the screw type when you need to remove your vent hose for cleaning.
Suggested installation order:
Step 1: Attach the Exhaust Port Extender
Step 2: Put the Ring Clamp loosely onto the dryer vent hose.
Step 3: Slip the dryer vent hose on the Port Extender OR your Glowforge Port.
Step 4: Tighten the ring clamp. Hand-tight – not super-duper tight. Overtightening can crack or tear the exhaust hose. It will look similar when done.

Step 2. Vent your Glowforge Exhaust Fumes
You have 4 options for venting your Glowforge exhaust:

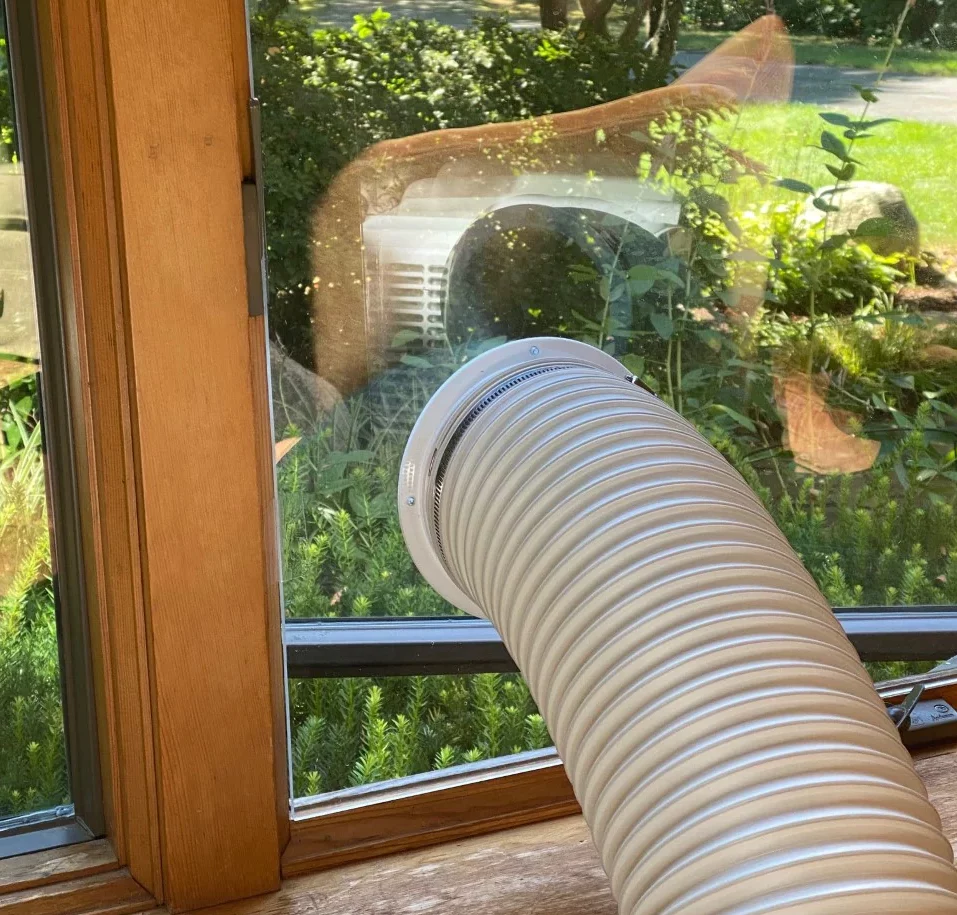
Option 1: Dangling Vent Hose out an Open Window
For many people, this will be the easiest and most cost-effective venting option. Not the best option for keeping the weather outside and A/C or Heat inside while you operate your Glowforge, but it is FREE as long as you have a window that opens to the outside. Keep in mind you more than likely have to remove the window screen too, letting bugs, rain, wind, and potential burglars inside your home. Glowforge recommends at least 3′ dangle outside open windows.
- PRO: FREE!
- CON: Exposed to the elements
- CON: Security risk!

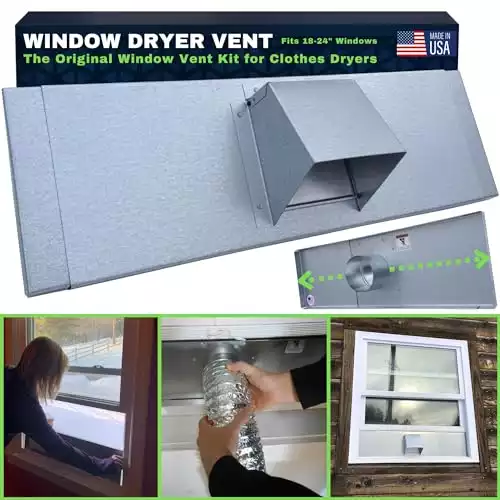
Option 2: Connect Vent Hose to a Window Dryer Vent
If you want protection from the elements, or if you’d like a more finished look to your Glowforge venting setup, then installing a Window Vent would be a great option. Most of these can be installed Horizontally or Vertically inside the window, then the weight of the window panel rests on top of the window vent to hold it into place. You can also easily remove the vent when you are not going to use the machine for a while or for extra security while on vacation.
- PRO: Finished look
- PRO: Easy to remove
- CON: Cost $50-$100+
- CON: Locking screws needed to keep window locked in place
Glowforge Window Vents
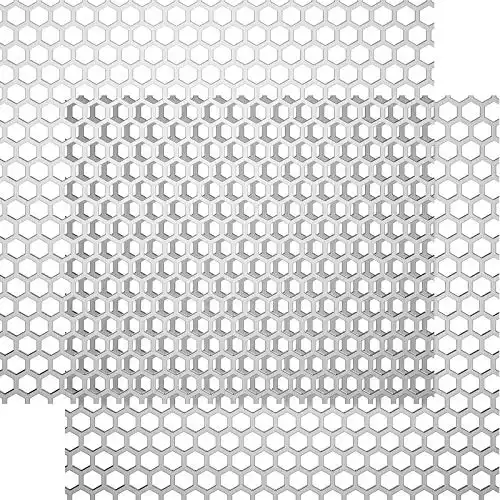

Option 3: Connect Vent Hose to a Wall Vent
This is more of a permanent installation, not easily changed. Requires DIY building skills or hiring it out to a handyman. Be sure to choose a wall vent with a bird or rodent screen to keep unwanted critters out. Get Snow? Make sure it’s installed well above your ground snow level.
- PRO: A+ in Security
- CON: Can be costly!
- CON: Needs to be cleaned

Option 4: Connect Vent Hose to an Indoor Air Filter
What can you do if you don’t have access to a window? If you know you won’t be able to vent your machine through a window/wall, then you’ll need to use a portable air filter machine to scrub clean your Glowforge’s dirty exhaust air to return clean breathable air to your surroundings.
Heads up, they aren’t cheap!
Plus/Pro: $1,295 for the Filter machine, $249 refill cartridge.
Aura: $399 for the Filter machine, $129 refill cartridge.
- PRO: Really Cleans the air
- PRO: Can set up anywhere!
- CON: Initial Filter cost
- CON: Replacement Filter cost
- CON: Often Out-of-Stock
*Note: If your Glowforge is more than 8 feet from a window*
With over 8-foot long continuous runs of exhaust vent hose, you will lose airflow and efficiency, to the point that you will not be able to operate your machine safely unless you add more airflow to your venting system.
The best affordable option when you can’t move the machine closer to the window, is to add an inline exhaust fan to help push the fumes outside.
Glowforge Inline Fans
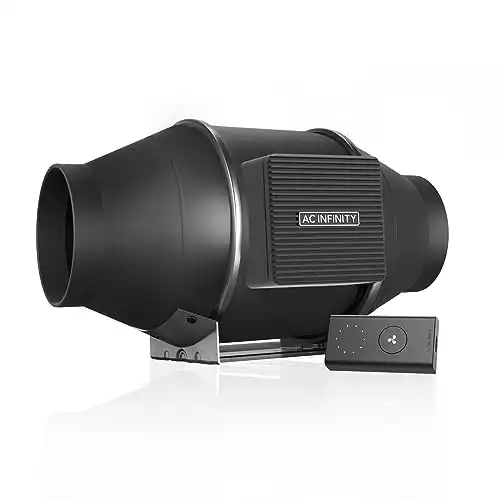
I use an AC Infinity Cloudline S4 series inline duct fan. This fan is super quiet and eliminated all traces of fumes in my workspace. My laser exhaust hose run is about 10 ft.
You’ll need an extra exhaust hose, an extra 2 hose clamps, and a power outlet nearby for the inline fan. Both the Glowforge and the inline fan have 4″ exhaust ports. Below is what the installed inline fan looks like, with hoses attached to each end.

Excellent blog here! This made all the difference in my setup. I have a long distance hose run, way more than 8 ft. Now the acrylic smell is much better.
So happy it helped you! Cutting Acrylic is the worst! I too have a long vent hose-run setup in my garage. Now to improve my wifi signal. Sigh.
Thank you for clearly outlining the setup! I was having trouble finding straightforward info. I got the filter but could not figure out if I still needed outdoor ventilation, now I know I can put the glowforge anywhere in the room.
Does this eliminate all fumes completely? I have my kids at home with me while I work and don’t want any fumes at all.
It removed all the fumes for me – but I only cut wood, have never cut acrylic which I hear is very stinky! I’m not sure anything would 100% but you can get darn close.
I am wondering if there are any alternative filters that can be used? I am outside of the USA.
Any industrial strength class 4 laser filters would do the job – it will boil down to size, cost, and level of filtration.
So I am waiting on delivery for my Glowforge, I found this to be an extremely helpful article, My workshop is a horse trailer and I need to know if you may have an answer to this question, my window is above the machine by about 3 feet, will that matter? I am really thankful for this article again thanks!
That’s plenty close enough, they include a 6 ft ventilation hose. Horse trailers typically have sliding windows, so the dryer vent inserted vertically into the window frame will be perfect for your setup.
Can you tell me how long a glow forge filter should last?
That’s entirely subjective – it depends on how many hours a day you’re cutting, what materials you’re cutting (draftboard fills it quickly), and what settings – all of that determines the life of the filter. I found that I needed to clean the pre-filters after each 8 hours of burning, I used a vacuum.
Here’s the estimated Filter Lifespan according to Glowforge: https://glowforge.com/faq/tech-specs#what-is-the-estimated-lifespan-of-the-filter-cartridge
Hi Sarah!
Thanks for linking my Glowforge Exhaust Port Extension on your beautiful website!
I recently came out with Custom Clear Acrylic Window Inserts and would love to send you one if you’d like! I also have a nice vent cover option too!
https://martinsonmanufacturing.com/collections/window-inserts
Thanks for the new product info! I’ll follow up with you via email to get a sample to test out and review and add it to my Glowforge ventilation guide.
Beneficial tips Cheers!